Quick answer: Creating a Newsletter in MS Word 365
- Open Microsoft Word and select a new blank document or use a pre-made template.
- Create a visually appealing layout by inserting text boxes, images, and headings.
- Customize fonts, colors, and styles to match your brand's identity.
- Save your template for future use to streamline your newsletter creation process.
Simple Steps for Professional Results
Creating a newsletter template in Microsoft Word is a straightforward process that helps you produce consistent, professional-looking documents efficiently. Most organizations have one or more newsletters for employees or customers. Better communication helps promote productivity, and collaboration, and can improve your brand presence. By using Word's built-in layout and design tools, you can create a reusable template that saves time and ensures brand consistency—perfect for administrative assistants, marketing coordinators, and other office professionals.

With Microsoft 365, you also gain access to cloud collaboration and AI-driven tools to streamline your workflow. This guide walks you through creating a modern newsletter template step by step, from setup and layout to saving your reusable .dotx file.
Plus, we’ll share a hidden feature that power users will appreciate: generating filler text with the =lorem() function. If you want hands-on learning to master the apps you’ll use, explore our Microsoft 365 courses.
Recommended next step: Learn with Microsoft 365 courses to speed up your newsletter workflow.
How do you prepare your workspace for a newsletter template in Word?
Before designing your template, it's essential to set up your document correctly. This ensures a consistent layout and helps align elements precisely and reduces formatting issues later.
- Open Word and start a Blank Document.
- Go to Layout > Size to choose Letter (8.5" x 11") or A4 and set Orientation to Portrait or Landscape.
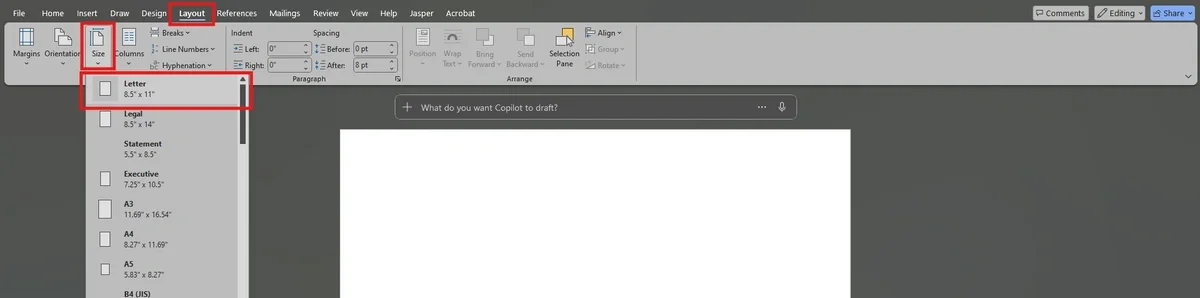
- In View, enable Ruler and Gridlines to help align text boxes and images. Note: This will activate gridlines on all your open documents. There’s nothing wrong with this, but just one of the many quirks of Microsoft.

Power tip: Need placeholder text? Type =lorem(2,12) and press Enter to generate two paragraphs of filler text (12 sentences each). Adjust the numbers to change the amount of text. This is ideal for testing spacing, fonts, and flow during design.
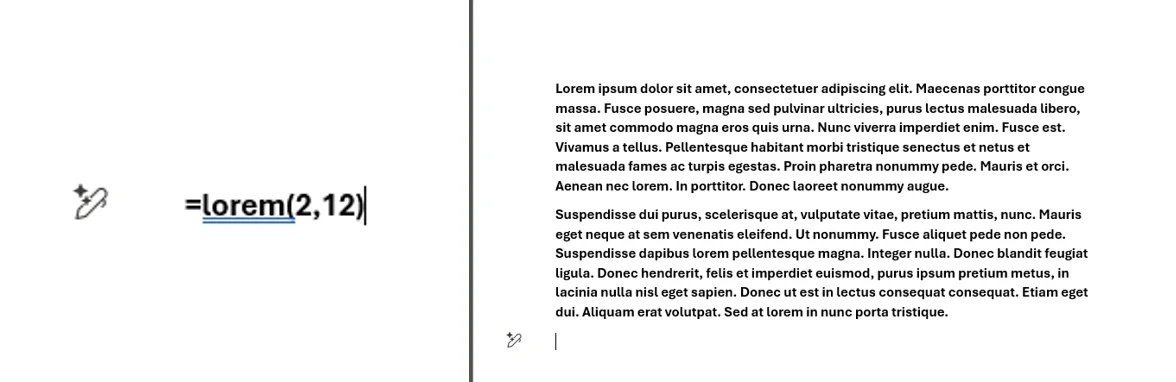
Filler text, like "Lorem ipsum," is used in templates to help you visualize how your layout will look once real content is added. "Lorem ipsum" is a type of placeholder text that has been used by designers and printers since the 1500s. The purpose is simply to fill space and mimic the look of real text, so you can focus on layout and design rather than content. This is important when making a template, because the real content should be inserted into a new document after the template design is finished and saved.
How can you create a multi-column newsletter format in Word?
A multi-column format gives your newsletter a clean, magazine-style layout. This structure makes it easy for readers to digest different topics side by side.
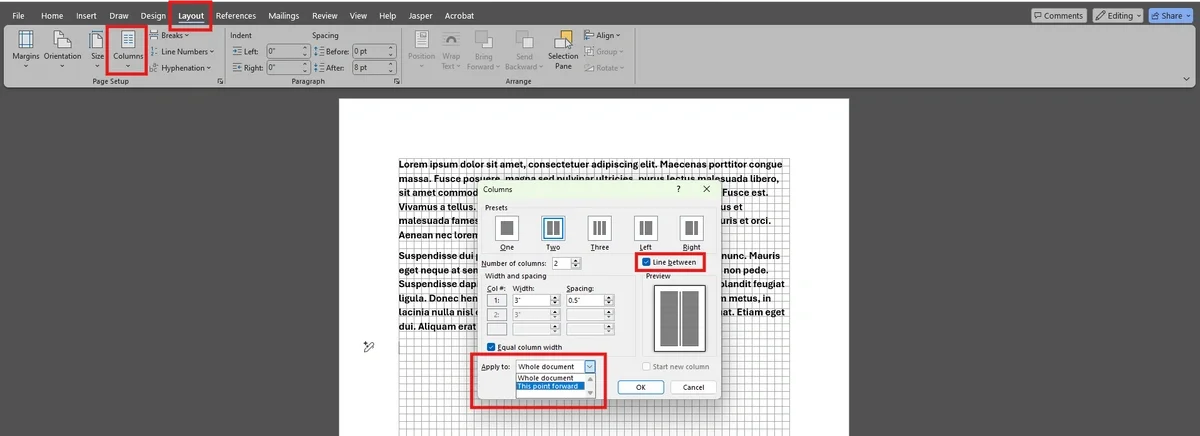
- Go to Layout > Columns and choose Two or Three or pick More Columns for custom widths and spacing.
- Select Line Between in the More Columns pop-up for clear visual separation.
- If you want a single-column masthead at the top, use the Apply to dropdown and choose This point forward if you want a single-column masthead at the top of the page, followed by multi-column sections.
- For mor column customization, select View > Ruler to allow you to resize the columns from the main view. You can also set the width from the More Columns… popup menu.

How should you design a branded masthead?
The masthead establishes your brand and sets the tone for the issue. It should reflect your organization's branding while clearly displaying the newsletter title.
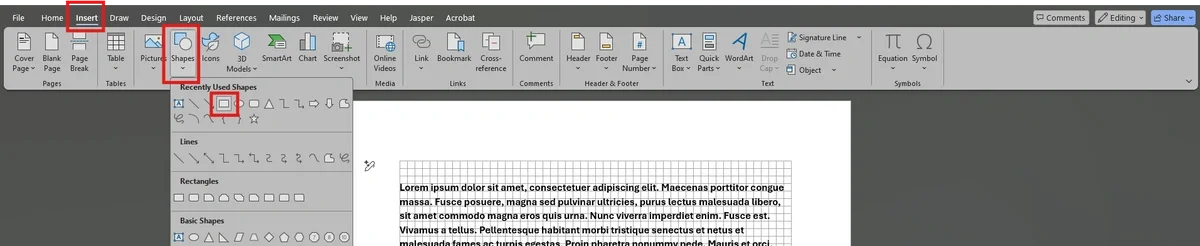
- Place the cursor at the top of the page.
- Insert > Shapes > Rectangle to draw a banner across the page.
- In Shape Format, set Height (e.g., 1.5 inches), choose a brand color for Shape Fill, and set Shape Outline to No Outline.
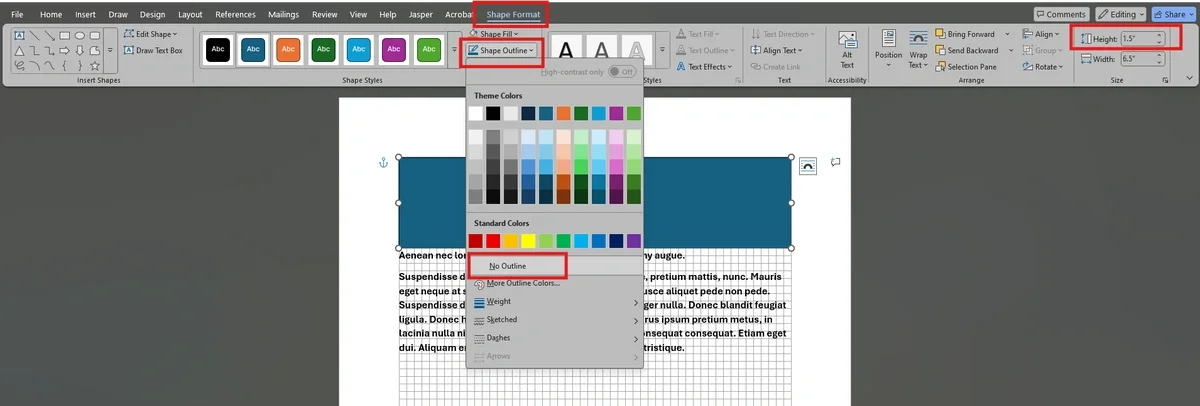
- If you already have text on the screen, you may want to select wrap text to push the existing text under the new rectangle. I recommend “Top and Bottom.”
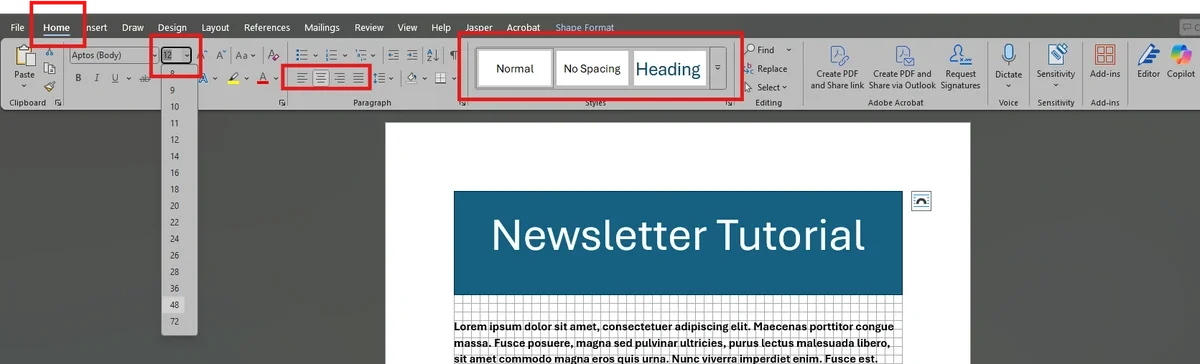
- Double-click inside the shape to add your title; style it from the Home tab.
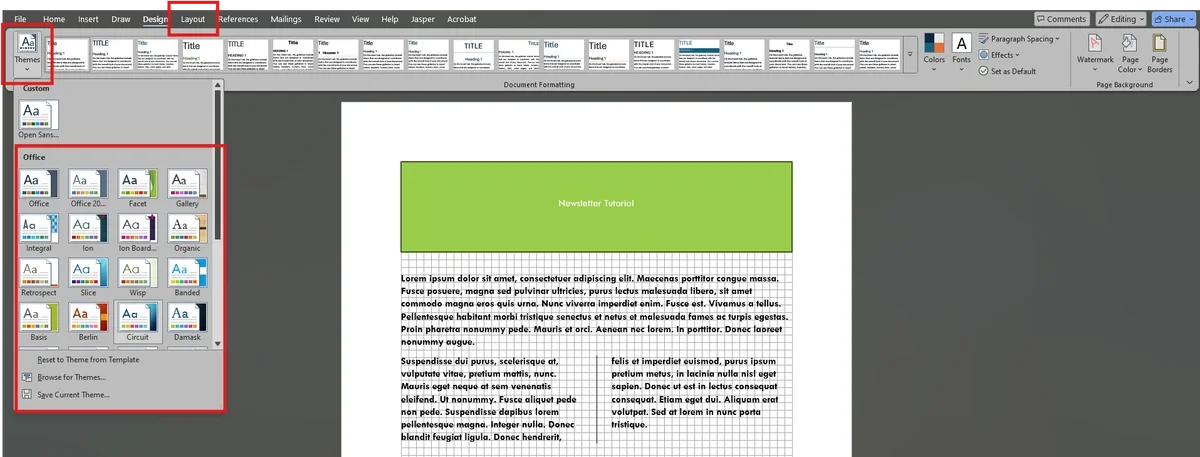
How do you apply themes for consistent design?
Themes unify fonts, colors, and effects for a cohesive look. In Microsoft 365, the modern Aptos font family helps keep designs current. You may need to adjust the theme to match your organization's branding.
- Go to Design and hover over themes for Live Preview.
- Customize brand settings via Colors > Customize Colors and Fonts > Customize Fonts.
- Save your custom theme for reuse across Office documents.
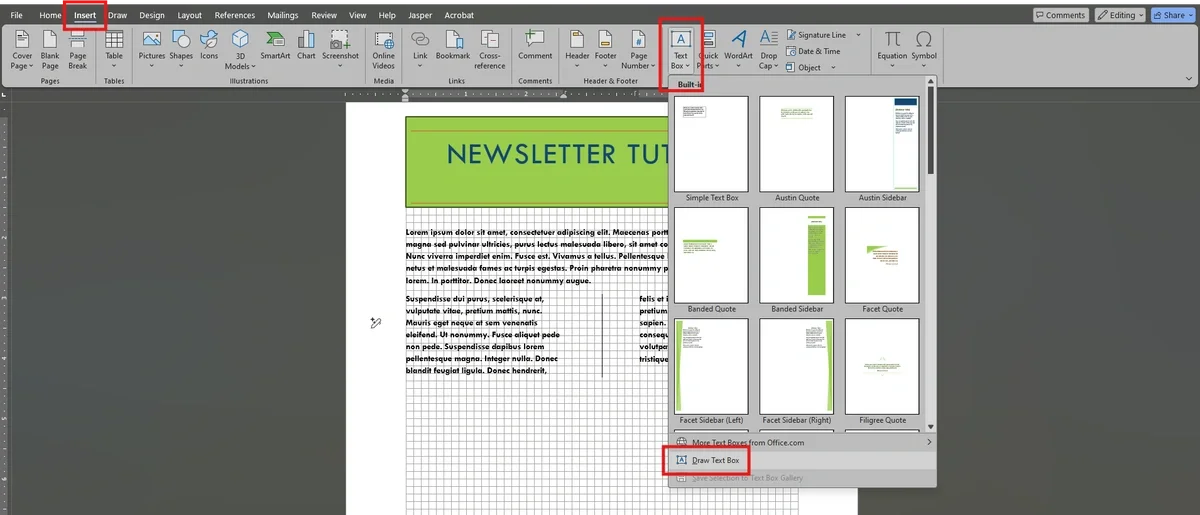
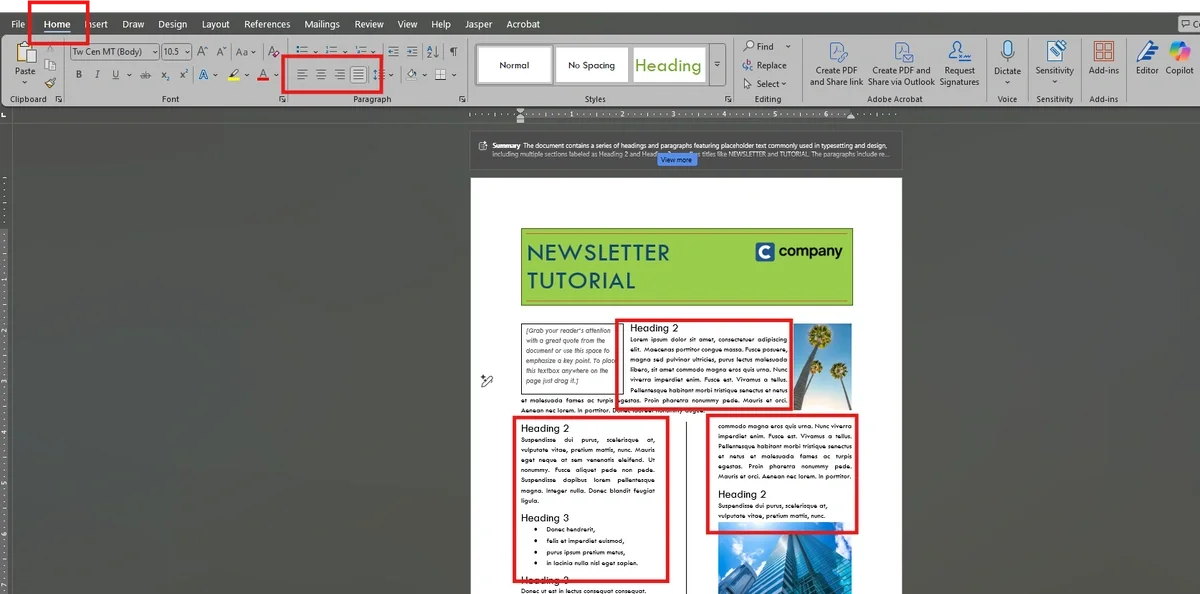
Why should you use text boxes for content?
Text boxes give you flexible control for rearranging articles, headlines, pull quotes, and sidebars without breaking the column layout. The modular approach allows you to rearrange articles, headlines, and pull quotes easily, creating a more dynamic design.
- Insert > Text Box > Draw Text Box and place it within a column (or across columns for a featured story). There are also built-in text boxes you can choose. This is a great option to ensure consistency.
- We’re going to place it in the first paragraph, to be a call-out quote. Select Shape Format > Word Wrap menu so the text moves around your text box wherever you place it.
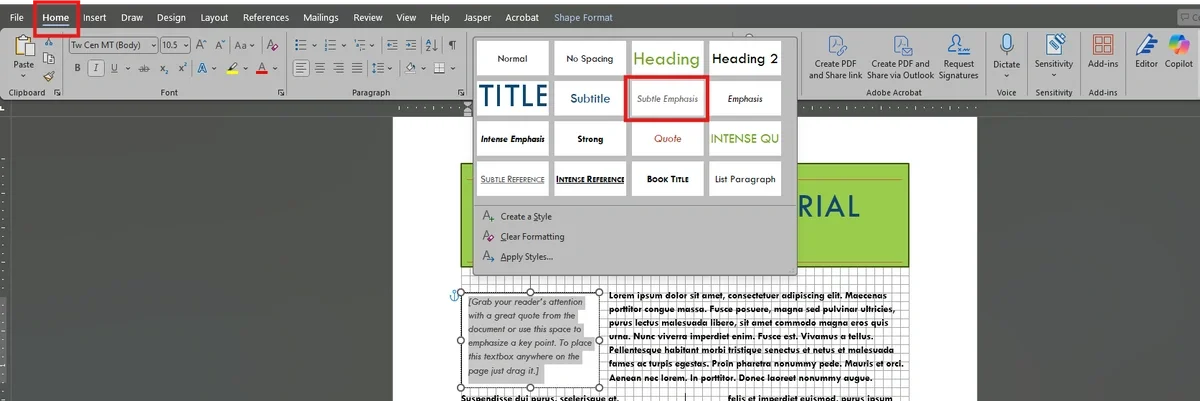
- Apply styles consistently from the Home menu (e.g., Heading 2 for titles, Normal for body).
- Use a pre-styled Quote Side Bar for callouts and highlights.
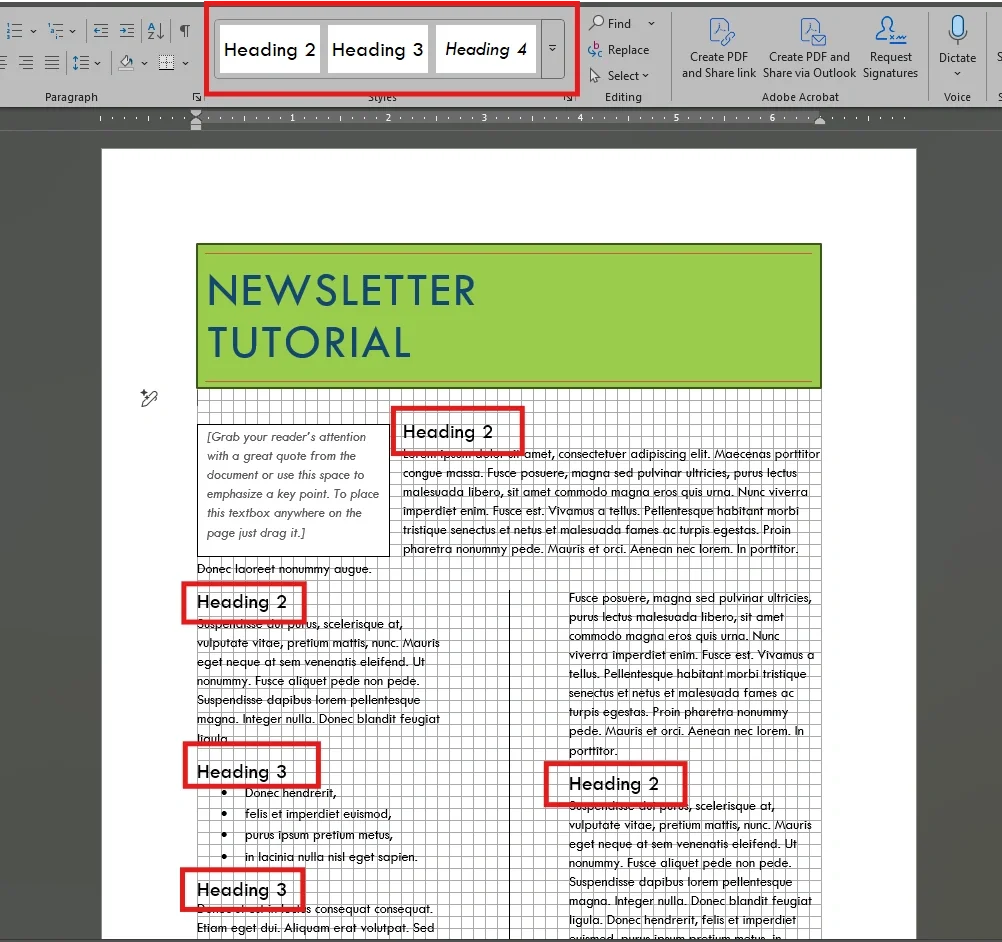
- Now you can add Story headings to your document. The start of each story should have a heading styled in “Heading 2” of your theme. Subheadings within each story should be styled as “Heading 3.” If you have heading under 3, then continue with Heading 4, 5, and so on. At the start of the next story, use Heading 2 for its title. Following a logical header hierarchy will make the newsletter easier to read.
- You can assist the reader further by closing each story or article with an End Mark or End Sign. It serves to indicate the conclusion of an article or story, signaling to the reader that the text has concluded. End marks can take various forms, such as simple shapes like circles or squares, or more decorative elements like logos or ornamental designs. You’ll see in later steps that I’ve chosen to use a diamond shape by selecting it from Insert > Icon.
- You’ll see in my example that I’ve Align Left all the headings. Consistent justification can be more pleasing to the eye, make the whole page look less cluttered, and allow you to better use the open space for images of graphics.
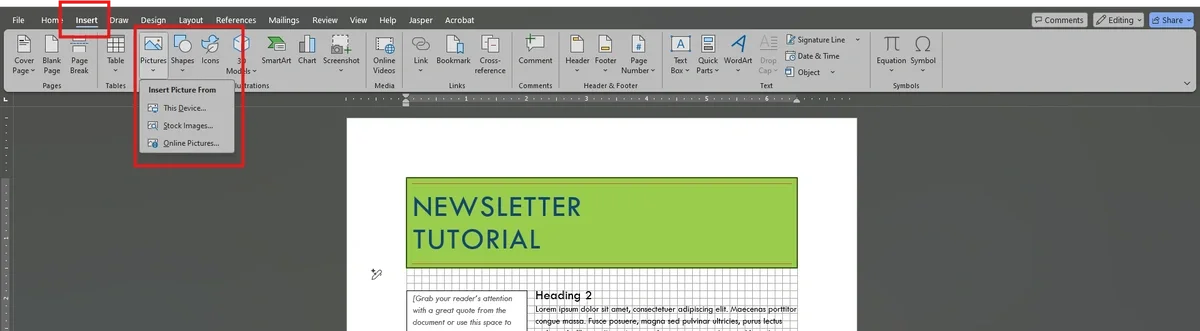
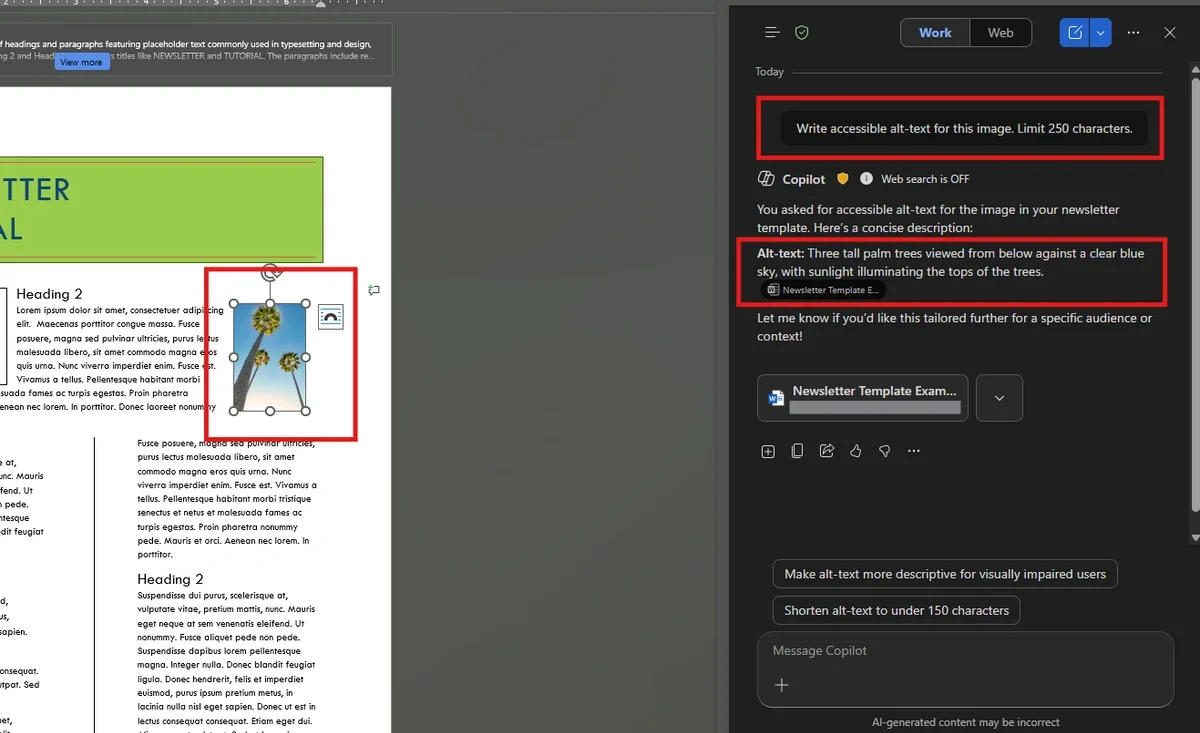
How do you insert and format images properly?
Images make your newsletter more engaging and help balance text. Word lets you insert images from your device, OneDrive, or its stock library and provides tools to integrate them seamlessly into your layout.
- Insert > Pictures to add images from your device, OneDrive, or Stock Images.
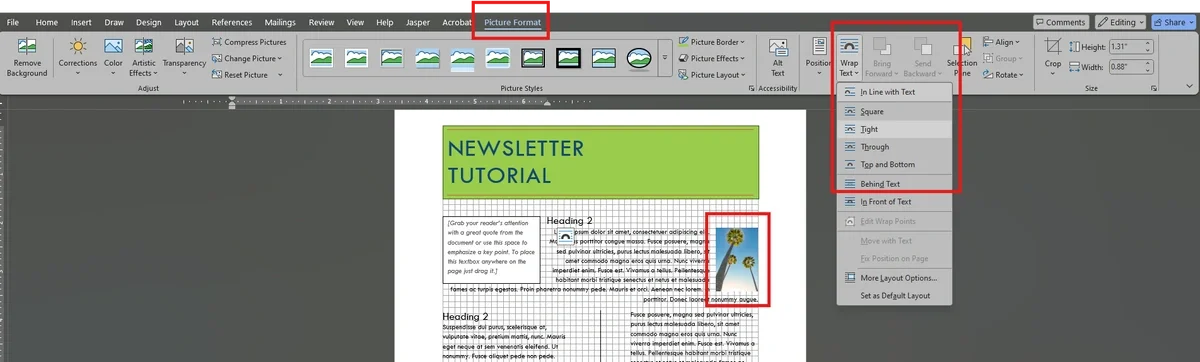
- In Picture Format, set Wrap Text to Top and Bottom so text flows cleanly around the image.
- Resize using corner handles and right-click > Edit Alt Text to add meaningful alt text for accessibility.
Power tip: you can use Microsoft 365 Copilot to help you write better alt-text! Drop the image into your Copilot Sidebar (you can use Copy and Paste to get the image into the prompt box) and use the prompt “Write accessible alt-text for this image. Limit 250 characters.” Putting a limit on the length will keep the Assistant from writing too much descriptive text, which could irritate anyone using a screen reader to listen to your newsletter.
Learning how to get the most out of your AI-powered assistant in just one day is easy with Microsoft’s official Microsoft 365 Copilot Chat course.
- For further customization, drop your company logo anywhere in the document, blow the masthead rectangle, and change the Word Wrap setting to “In Front of Text.” Then you can place it on the right side of the masthead to brand your newsletter. Remember to add alt-text to this image too.
- For final touches and clean-up hide the gridlines and consider adding a Footer image to close your document. Simply follow the steps taken to add the header.
- Additionally, consider changing the body text from Align Left to Justify.
- This can be more pleasing to the eye as it spaces out the words in each column so both the right and left sides of the text form a clean smooth edge. When aligned on the left side, the right edge of the column can look uneven and jagged.
- If your columns are very narrow, then avoid Justified, as the justified spacing in narrow columns can be awkward. Very narrow columns can be left justified.
How do you save a newsletter as a reusable template?
Save your design as a template so you can create on-brand issues quickly without rebuilding layouts. This ensures your original layout stays intact while allowing you to create new, on-brand documents effortlessly.
- File > Save As > Browse.
- In Save as type, choose Word Template ([.dotx] — see Microsoft’s guidance on saving a Word Template (.dotx)).
- Word recommends saving templates to your Custom Office Templates folder, this is the best option if you are the only one who will be using the template. Though you can save it anywhere it can easily be found by you or your team, such as to a SharePoint folder.
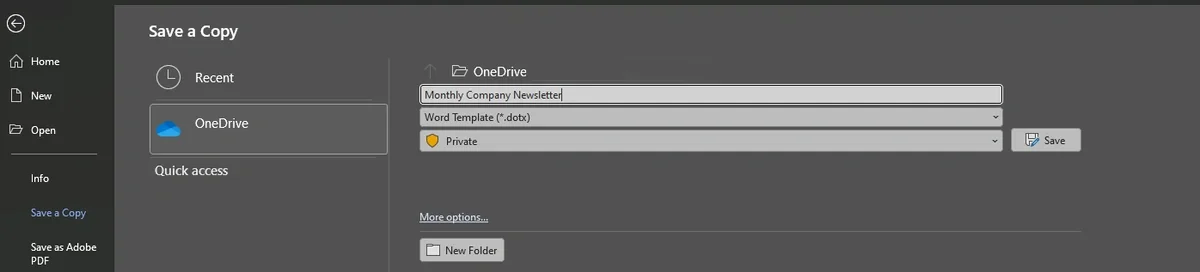
- Name the file (e.g., “Monthly Company Newsletter”) and Save.
- To use it later, go to File > New > Personal (or Custom) and select your template.
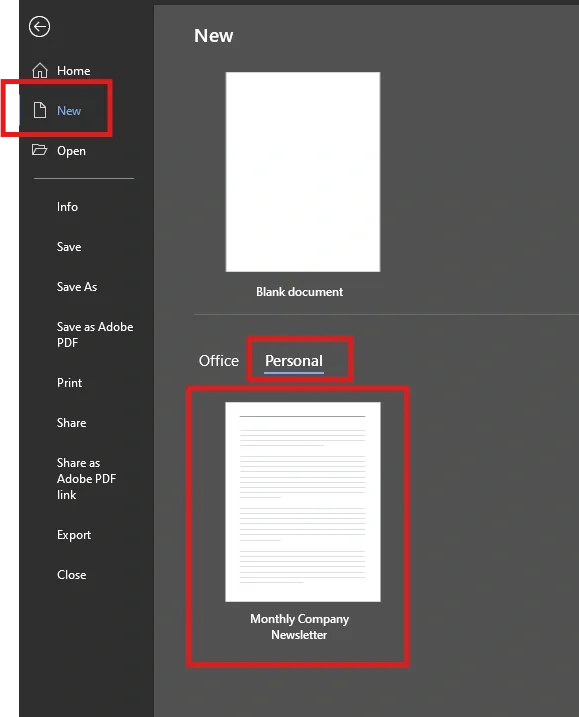
Note: If you saved the template anywhere other than the recommended Custom Office Templates folder, then it will not automatically be found under the New menu.
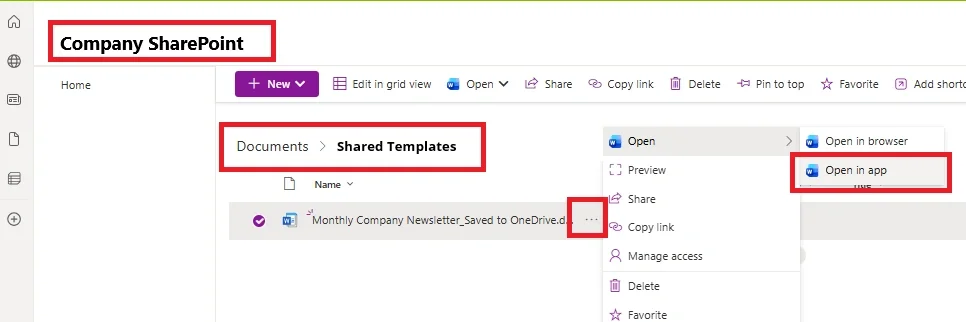
If you saved it to a team SharePoint folder, then open the file from that location using SharePoint to start a new document from the template. Pay close attention to how you access the template. Opening the template from Word’s Open menu will open the master template for editing and not start a new document as you may have intended. To start a new document which uses the template, open the document directly from the SharePoint site.
Well done! Now get out there and get publishing!
Next steps
You now know how to prepare your workspace, set a multi-column newsletter format in Word, design a branded masthead, apply themes, and save everything as a reusable template file. If you’d like guided, hands-on practice with Microsoft tools beyond Word, check out business applications training and get recognized with Microsoft certifications to advance your skills.
- Explore Microsoft 365 courses for hands-on learning.
- Discover business applications training.
- Pursue Microsoft certifications to validate your skills
Frequently Asked Questions (FAQs)
Can I use free newsletter templates in Word?
Yes. Go to File > New and search “newsletter” for free starting points you can customize. If you need help saving your customizations for repeated use, see Microsoft’s guide on creating a template.
What is the best newsletter format in Word?
A single-column branded masthead at the top followed by a two- or three-column layout works well. It keeps the header strong and the content scannable.
How do I share my newsletter template with my team?
Save the .dotx to a shared OneDrive folder or a SharePoint document library. Team members can open it from that location and create new documents based on the template. Have them open the document from the SharePoint site to use the template for a new document.
Can I edit a template after I’ve saved it?
Yes. Use the Open menu in Word to open the .dotx from your Custom Office Templates folder (or wherever it is stored), make changes, then save again. For step-by-step details, see how to edit templates in Word.
Can I download the template file from this guide?
Sure! You can download the sample .dotx here and use it as a jumping off point for your custom newsletter.